Friday, June 21, 2013

Finally, the Bread!

This recipe came from my mother and her good friend.  As with the starter, I am unsure of its origin, but I have seen other similar recipes.

Sourdough Bread - makes 2 loaves

1 & 1/2 cups sourdough starter
1/3 cup sugar
1 & 1/2 cups warm water
1/2 cup oil (I use canola)
1 tsp salt
Mix ingredients well in a large bowl.  Add 6 cups of flour and knead.  Set in large bowl, cover with a wet (nearly dripping) towel, and allow to rise overnight or at least 8 hours.  Punch down dough and knead with a little more flour.  Divide and put into 2 greased loaf pans.  Set in a warm place and allow to rise 1 hour, until doubled.  Baste with melted butter and bake at 350 for 45 minutes. 

The Fella took these pictures, which explains the better quality.  He has the fancy camera, while I have the lame Point-And-Shoot.  For this batch, I used 3 cups unbleached, all-purpose flour, and 3 cups whole wheat flour.  We love the taste of the wheat flour, but I must warn you that the dough will not rise as much due to the weight of the flour, and sometimes it takes mine a full 24 hours to rise.  I do have a recipe for official "whole wheat sourdough bread," and it includes dry yeast in the ingredients.  I assume this is to give the starter some extra "oomph" in order to rise sufficiently.  If you don't mind having tiny sandwiches, then you can just substitute 3 of the 6 cups of white flour for whole wheat. 

Mixing the starter, water, oil, sugar, and salt.  I have this wonderful bread spoon that has a hole in the middle.  Unfortunately, I don't know where you can find them.

The dough will be quite wet - put at least another cup of flour on your counter for kneading.

I sprinkle more flour over the top.  This is just a mason jar that I put a lid on from the cheap grated Parmesan canister and use for kneading flour.  I don't want to get dough in my flour bin.

To knead, fold the top half of the dough over and toward you.

Press down with your palms and the heel of your hands.  I highly recommend taking off the watch.

Next, fold dough over from the side.

Turn, and press again.  Continue this process, working in the flour on your board until the dough feels smooth and elasticy. It should not be sticky.

Form into a ball by turning the edges underneath.

Return it to the bowl.  Most sources say to put it in a clean bowl, but I don't have another one large enough, and I find that the bits of dough on the sides get incorporated to the dough ball as it rises.  My bread has never failed because I used the same bowl.

Covered, and ready for lights out - good night!

The dough should more than double in size when finished with the first rise. Be patient! Sometimes my dough rises in 12 hours, sometimes 18. This took 24 hours.  It depends a lot on the freshness of your starter, the temperature and humidity, and the type of flour used. When I do this with all white flour, the dough will be over the edge of the bowl.  Punch this down and empty onto a lightly floured surface.

Knead lightly and flatten a bit.  I like to form a large rectangle and then divide it in half.

To form loaves, roll edges together, pressing out air bubbles and then turn under the short edges.

Put into prepared/greased baking pans.  I could not live without these two Pyrex pans.  I simply use cooking spray. Leave to rise another hour and brush melted butter over the tops before baking.

I was not impressed with the lack of rise on these loaves.  Squatty sandwiches are lame.

This one also cracked across the top.  It might be because I didn't form the loaves very carefully or didn't work out some air bubbles.  Annoying, but still tasty.


Please comment and let me know if you try out the sourdough recipes, or if you have a starter and would like some additional recipes.  I have this lovely book from the 70s:
I would love to share some of the goodness!

Thanks for reading.

Tuesday, June 18, 2013

Pants on Fire

I said I would post the sourdough bread recipe tonight.  I lied.  We are switching back and forth between the Voice finale and the NBA finals. 

Sorry.  Not really, though.  Well...a little. 

Monday, June 17, 2013

Waiting For the Bread to Rise

I am literally waiting for my sourdough bread to rise before I put it in the oven this evening.  I'll divulge the recipe tomorrow.  In the meantime, I'll let you know what I've been doing over the last week or so:  sewing, and a much-needed, spontaneous getaway to a small town with a river that runs through it.  I grew up going swimming in this river, and it's a fantastic place to let your stress float away.  I feel privileged that I could get my kids in the river too.  We unplugged for three days - no electronics was my rule, and it was so worth it.  I feel restored. 

For Father's Day, my girl and I made a pair of pajama shorts for The Fella.  I shall not be including photos, as my man has major objections to his drawers being on the interweb.  I used McCall's 4244, and made no changes, except to reinforce the pocket openings in the side seams by back stitching.  The fit was spot-on. 

I also made this for the girl:
It is McCall's 5613, hacked big time.  My girl is tall and skinny.  I cut a size 7 in the facings, and a 10 in length, and it still hits just above her knees.  Then I had to cut out FOUR inches in the facings, after I had already added the flat piping and attached the skirt.  Since the overlap in the piping was right in the back, I decided just to stitch a long seam straight down the back, therefore avoiding the dreaded removal of the piping to take it in correctly on the side seams.  Like it says at the top of the blog, I am a beginner sewist.  Thank God my mom has been sewing since she was fifteen and I can call her with questions.  I think it turned out alright, even though the print doesn't match in the back.  The print on the skirt portion lined up perfectly. 


I spent a ridiculous amount of time on this dress.  It should have taken me four hours, five tops.  For some reason, stitching down the inside facing was a horrible task.  I decided to top stitch just above the piping, and then I added a little decorative stitch at the hem with my fabulous Singer zigzag attachment.  I used a bright orange nylon thread that my girl gave me for Christmas, and begged me to sew her dress with - I used regular thread for the construction, just so you know. 

My eyes were crossing while watching the zigzag attachment do its thing.  In total, I spent NINE stupid hours on this dress.  I threatened my girl several times that she'd better wear it, or I shall not be making another garment for her.  Ever.  She looks adorable in it...

Also, this here is going to be a fun little project:
This is oilcloth that I picked up while shopping during my stealthy getaway.  I'm so excited to show you what it's going to be!  Not today, though.  I've also been doing a little manual labor outside.  This washbasin full of veggies came out of my grandfather's garden.  I got a second haul the next day.  I have 36 tomatoes in my kitchen right now.  Can we say, "Gazpacho"? 


Meet you back here tomorrow, with some sourdough bread - I'm off to put it in the oven.  Thanks for reading.

Wednesday, June 5, 2013

Sourdough!


I stopped buying bread for my family long ago for a few reasons:  one - my Fella is a bread snob, and won't eat the super-soft Mrs. Baird's-type breads that rip apart when you spread peanut butter on them; two - I am cheap, and the bread he likes costs roughly $4.00 for a small loaf; and three - the amount of sugar and other unnecessary ingredients in bread blows my mind.  I'm not the kind of mom who bans sweets - I just have the opinion that if I want some sugar in my life, I want to do it up good with a piece of cake or some cookies, or the entire pan of zucchini blondies that I may or may not have eaten the other day...rather than get my entire sugar intake from bread.  My sourdough starter does have some sugar in it and the bread has 1/3 cup between two loaves, but at least it's not high fructose corn syrup.  I am also not opposed to food that comes out of a box, but I am trying to get better about feeding my family things that are free from preservatives and have natural ingredients. 

I am also insane.  I decided one spring while the first child was a toddler, and the second child was nary a thought-that-crossed-my-mind, that I wanted to try my hand at sourdough.  I remember my mom having this huge jar in the fridge with her starter, and how the entire house would smell amazing when she would make the bread.  I roused a sleeping monster within me once I got the hang of it.  I became obsessed.  I kept the starter alive until that Christmas, when I accidentally miscalculated how much I had and used it all to make rolls for my in-laws' Christmas dinner.  After that, I had a series of about four starters that I killed.  So last August, I decided that I would try one more time, but I did a little research first in order to try to find the reason for my previous starter mishaps.  I had to conquer, and I did!  I have kept this one alive, although I confess I have abused it a little and had to bring it back from its death-bed once.  She is faithful and going strong, and oh so tasty.

I do want to give a shout-out to the busy working parents out there and tell you that this is totally doable.  It is not time-consuming at all.  You simply need to be mindful of your starter and replenish it every 5 to 7 days.  Contrary to what some sources say, you CAN store a starter in your fridge.  I take mine out and bring it to room temperature before I use it, and then replenish after using.  I will share my recipe here with you, and in the next posting I'll give the bread recipe. 

I don't know the origin of this particular starter - my mom got it from a friend of hers many years ago.  I do not recommend using whole wheat flour in this.  There are other starters that use whole wheat flours, and those recipes vary in their ingredient list.

2 cups all-purpose, unbleached flour
1 teaspoon salt
3 Tablespoons sugar
1 Tablespoon dry yeast
2 cups lukewarm water

In a large bowl, combine dry ingredients and gradually add water.  Cover with a wet towel and let sit for 3 days.  Stir 2 to 3 times each day. 

After 3 days, your starter is properly fermented and ready to use.  After using, replenish by adding 1 cup warm water, 2 Tablespoons potato flakes (instant mashed potatoes - plain, not flavored!), 1/2 cup sugar, and 1 cup flour.  Stir, cover with a damp towel, and allow to sit out for 12 hours. 

Some helpful tips:
  • The starter will often separate and have a yellowish liquid on top.  This is normal - just stir it before use. 
  • I highly recommend waiting to refrigerate the starter until it has been going for a week or more.  I found that my starters were dying because they weren't strong enough before storing in the fridge.  I kept this one out for around 10 days, and replenished every day until then.  If you keep your starter at room temp, you will need to replenish every other day at the very least. 
  • When replenishing, don't worry if the flour is not completely incorporated and the starter looks lumpy.  The lumps will be "eaten" by the starter over the 12 hours it sits out.
  • Most importantly, use ONLY wood or plastic mixing spoons, measuring cups and spoons, and mixing bowls.  Everything I have read says the same thing. 
  • Store the starter in a glass or plastic container.  I use a glass pitcher covered loosely with plastic wrap.  If your container has a lid, punch a few holes in it to allow gases to escape. 
  • If you aren't using the starter within 5 to 7 days, simply toss out 1 cup and then replenish with the above recipe. 

Good luck, happy eating, and thanks for reading!

Wednesday, May 29, 2013

I'm in a Pickle

I am the fortunate recipient of this little gem:


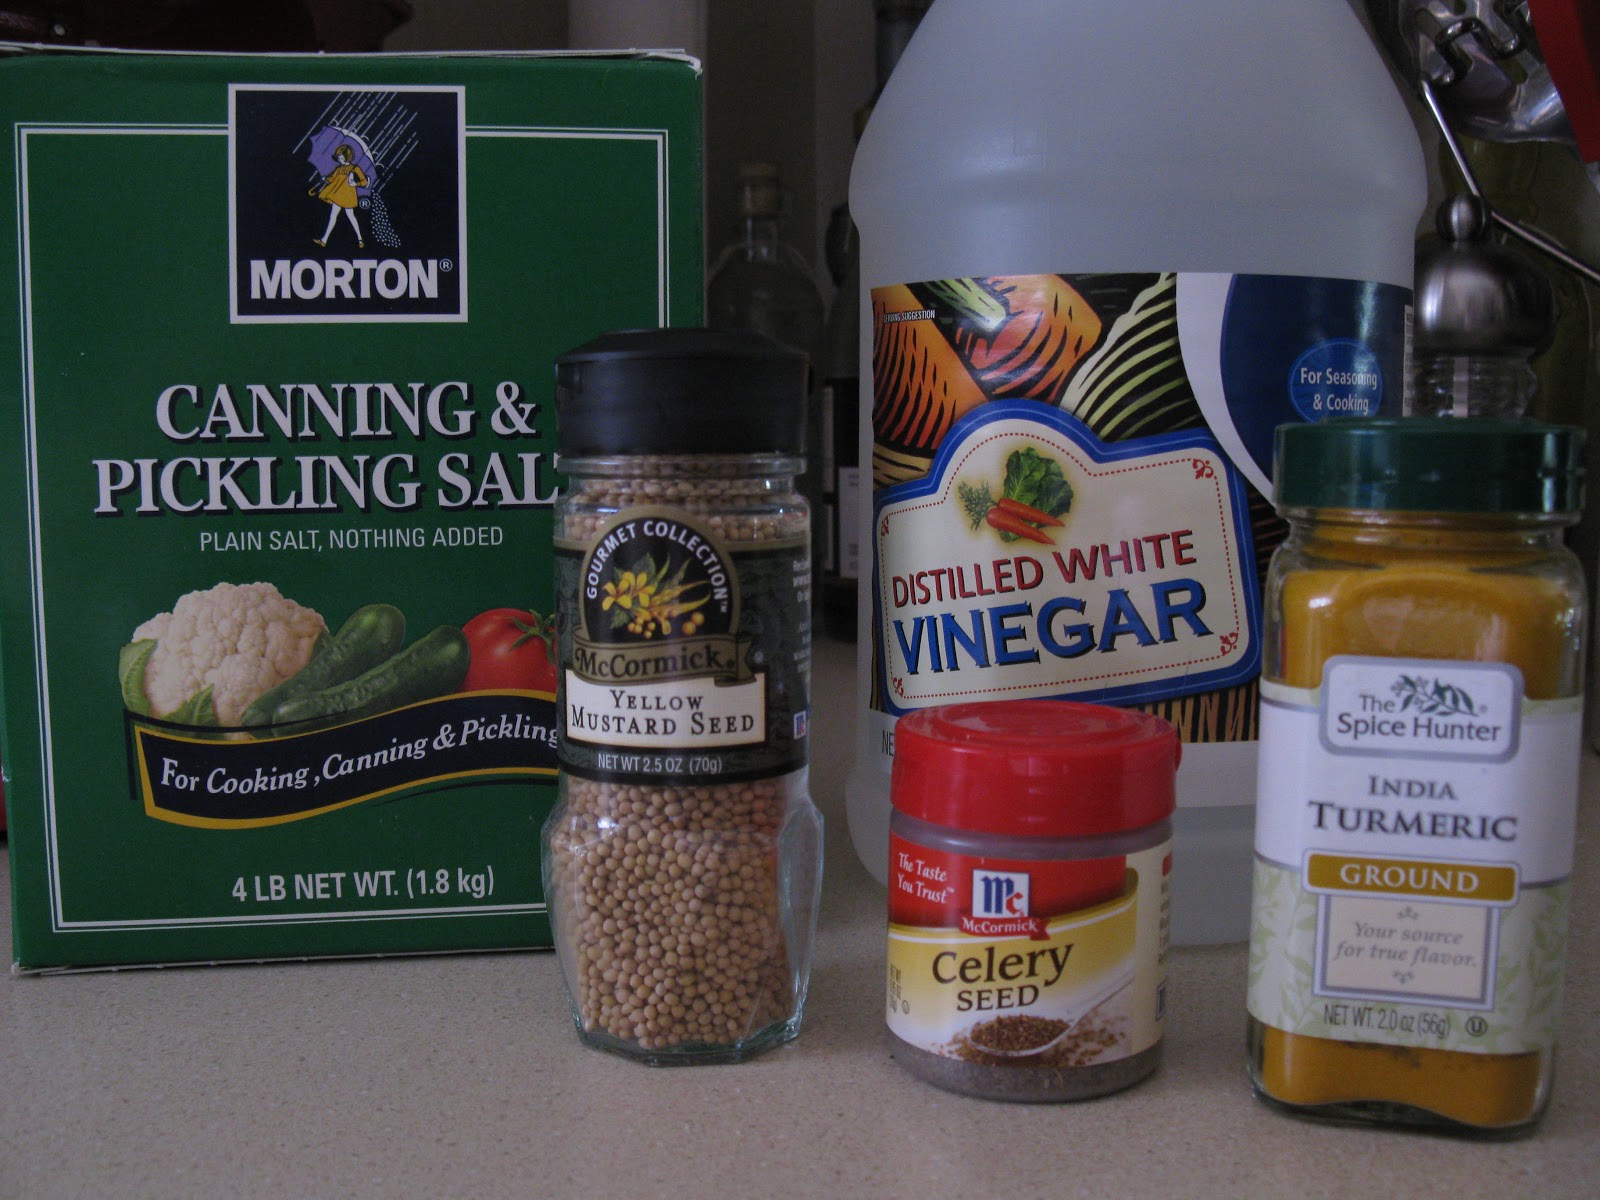
It's my grandparents' recipe, typed out by my grandmother.  Their garden is exploding with tomatoes, zucchini, corn, and cucumbers right now.  Cucumbers have not fared exceptionally well in my own garden, so I decided not to plant them this year.  Good thing, because the grandparents have plenty to share!

I made Bread and Butter pickles today, which is quite easy to do.  You prepare the cucumbers and cover with ice for 3 hours.  The actual cooking and canning took me 30 minutes from start to finish.  This is a great recipe to start with if you're just getting into the canning thing. 

Wash, drain and slice 4 quarts cucumbers
1 1/2 cups sliced onions
1 garlic clove
Combine in a large bowl or pot, add 1/3 cup pickling salt, and mix well.  Cover with 2 quarts of crushed ice.  Let stand 3 hours.

Drain and remove garlic.


Combine in a large pot:
4 cups sugar
1 & 1/2 teaspoons Turmeric
1 & 1/2 teaspoons celery seed
2 Tablespoons mustard seed
3 cups white vinegar

Bring this to a boil, then add cucumbers and onions, and cook for 5 minutes. 

Pack in hot jars, seal, and process jars for 5 minutes in boiling water.

Some tips for canning:
I have found it essential to have a canning kit - such as this one from Ball.  Trying to fish jars out of boiling water with a pair of tongs got old very quickly.  You'll need to have a large pot (mine is a 12-quart stock pot) filled about half-way with boiling water for processing the jars after filling them.  I also keep another saucepan on the stove with the lids and bands in simmering water.  After washing and drying the jars, I keep them warm on a baking sheet in a 200 degree oven.  It is important to work with hot jars, lids, and bands in order to get a proper seal when preserving.  Be sure to adhere to cooking times and use exact measurements, especially if making jellies and jams.  It's not rocket-science, but it is precise. 

Good luck, and good eating!


Friday, May 24, 2013

Open Letter to Oxyclean

Dear Oxyclean,

I have a confession:  I've been away.  I doubted how great your oxygen power truly is.  I cheated on you, and bought other "stain removers."  Sure, they got the job done most of the time.  Sometimes I had to reapply, but they were satisfactory. 

The thing is, Oxyclean, you are pricey.  When young-uns are eating you out of house and home, and diapers take up most of the budget, it's hard to pay nearly $10 for a small bucket of you. 

Then it happened.  I had to come back.  My child's white school shirt got a red smoothie stain down the front, from the chest to the hem.  I soaked it, I sprayed it thrice.  And then I remembered.  Oxyclean, YOU were the one that eradicated baby poop from my daughter's beautiful smocked and embroidered dress.  So I took a deep breath and a dollar-off coupon, and threw you in my cart at the store. 

And I soaked the shirt for 4 hours.  And you did it.  You rid us of the smoothie stain. 

Thank you, Oxyclean.  I will never doubt you again.  I love you.

Tuesday, May 21, 2013

A Crowd-Pleaser!

Growing up, my mother says that I ate everything.  Rarely did she fix something for supper that we didn't like.  Imagine my shock when I discovered that my kids are horribly picky eaters!  My Fella (a.k.a. Husband) also has his share of likes and dislikes, therefore I can rarely please all four of us. 

Of all things, this eggplant recipe is one of the few meals that everyone likes.  I came across it last summer, when my grandparents gave me a beautiful eggplant from their garden.  The only way I had ever prepared an eggplant (and enjoyed it) was to fry it.  Boring.  Everything else I've tried just ends up a soggy mess. 

This is Crispy Eggplant Parmesan - a Sandra Lee recipe from Food Network.  I've tweaked it just a bit to my taste, and I have also substituted a canned spaghetti sauce when I was in a pinch. 

2 med or 1 large eggplant - look for one that is firm and shiny (if the skin is dull, it will most likely be past its prime)
1/2 cup flour
2 eggs
1/2 cup water
1 cup bread crumbs
1/2 cup cornmeal
2 tsp. Italian seasoning
grated Parmesan
Salt & Pepper, to taste

Preheat the oven to 375.  In one bowl, combine flour, salt & pepper.  In a second bowl, whisk eggs and water.  In a third bowl, combine bread crumbs, cornmeal, Italian seasoning, 2 Tbsp Parmesan, and salt & pepper.  Slice eggplant crosswise 1/4" to 1/2" thick.  Dredge in flour, then dip in egg, and then dredge in breadcrumb mixture.  Place on a rack over a baking sheet (line with foil for easy clean up).  Bake 30 to 40 minutes, or until eggplant is golden and crisp.  Thicker slices will need to bake a little longer.

(My apologies for the poor quality of the photos here - I thought there was enough light in the kitchen this evening.  Apparently not).
 
For the sauce:
2 Tbsp olive oil
1 med. onion, minced
1 Tbsp. garlic, minced
2 tsp Italian Seasoning
28 oz. can crushed tomatoes
 
In a saucepan, heat oil, then saute onion 5 minutes.  Add garlic, cook 1 minute more.  Add Italian seaoning, crushed tomatoes, salt & pepper to taste.  Simmer 10 minutes.


Change the oven to broil.  Overlap eggplant slices in rows in a large baking dish.  Cover rows with sauce and remaining cheese.  Broil 3-4 minutes or until cheese bubbles and begins to brown.
 

I serve this with salad and French bread, and my Fella doesn't complain that it's meatless - he is as Meat-and-Potatoes as they come.  Any leftovers can be used to make an Eggplant Parmesan sandwich.  Simply put it on a sandwich roll with a little extra sauce and cheese if needed, and toast in a toaster oven or under the broiler.

Enjoy!